안녕하세요. 연봉 1억 개발자 dev-woo 입니다
오늘은 python 코드를 사용해서 naver블로그에 있는 글들을 크롤링해서 csv 파일로 저장하는 것을 해보겠습니다
크롤링은 아시다시피 naver에서 주기적으로 html태그의 속성을 변경하는 식으로 막고 있는데
2024.02 월 기준으로 잘 동작합니다 혹시라도 안되면 댓글 남겨 주세요 :)
블로그 크롤링 동작 순서
저 같은 경우 naver api를 통해 제가 원하는 검색 키워드에 해당하는 블로그 url을 가져온 후 그걸 BeautifulSoup를 이용해 Html문을 파싱 해서 파일로 만들고 있습니다.
그래서 전체적인 개요 순서는 다음과 같습니다
1. naver api로 원하는 검색 키워드에 해당하는 블로그 url을 가져온다
2. url을 selenium을 통해 open 하고 html문을 가져온다.
3. 가져온 html문에서 title, contents, postdate을 추출한다.
4. csv파일로 저장한다.
naver api로 원하는 검색 키워드에 해당하는 블로그 url 가져오기 위한 Key 발급
우선 naver api 사용을 위해 naver api key를 발급받아야 합니다
https://developers.naver.com/apps/#/list
애플리케이션 - NAVER Developers
developers.naver.com
여기서 애플리케이션 등록 신청을 하여 발급받습니다.

애플리케이션 이름에 아무 이름이나 넣으셔도 됩니다.
사용 API에서는 "검색"을 선택합니다
환경 추가에 "WEB 설정"을 선택한 후 웹서비스 URL 란에 "http://127.0.0.1"을 넣어주고 등록하면 됩니다.
이렇게 하면 naver api key발급이 끝납니다
아주 간단하죠? 1단계 끝입니다.
naver api로 원하는 검색 키워드에 해당하는 블로그 url 가져오는 Python Code
아래는 작성된 python code입니다
python 3.6 이상에서 테스트했으므로 3.6 이상으로 추천드립니다
python 설치는 여기서 별도로 다루지는 않지만 miniconda로 하시면 편합니다
from bs4 import BeautifulSoup
import requests
import re
import time
import os
import sys
import urllib.request
import json
from selenium import webdriver
from selenium.webdriver.common.by import By
from webdriver_manager.chrome import ChromeDriverManager
from selenium.webdriver.common.keys import Keys
import pandas as pd

# 웹드라이버 설정
options = webdriver.ChromeOptions()
options.add_experimental_option("excludeSwitches", ["enable-automation"])
options.add_experimental_option("useAutomationExtension", False)

# 버전에 상관 없이 os에 설치된 크롬 브라우저 사용
driver = webdriver.Chrome(ChromeDriverManager().install())
driver.implicitly_wait(3)
# 버전에 상관 없이 os에 설치된 크롬 브라우저 사용


# Naver API key 입력
client_id = ''
client_secret = ''


# selenium으로 검색 페이지 불러오기 #
naver_urls = []
postdate = []
titles = []

# 검색어 입력
keword = input("검색할 키워드를 입력해주세요:")
encText = urllib.parse.quote(keword)

# 검색을 끝낼 페이지 입력
end = input("\n크롤링을 끝낼 위치를 입력해주세요. (기본값:1, 최대값:100):")
if end == "":
    end = 1
else:
    end = int(end)
print("\n 1 ~ ", end, "페이지 까지 크롤링을 진행 합니다")

# 한번에 가져올 페이지 입력
display = input("\n한번에 가져올 페이지 개수를 입력해주세요.(기본값:10, 최대값: 100):")
if display == "":
    display = 10
else:
    display = int(display)
print("\n한번에 가져올 페이지 : ", display, "페이지")


for start in range(end):
    url = "https://openapi.naver.com/v1/search/blog?query=" + encText + "&start=" + str(start+1) + "&display=" + str(display+1) # JSON 결과
    request = urllib.request.Request(url)
    request.add_header("X-Naver-Client-Id",client_id)
    request.add_header("X-Naver-Client-Secret",client_secret)
    response = urllib.request.urlopen(request)
    rescode = response.getcode()
    if(rescode==200):
        response_body = response.read()

        data = json.loads(response_body.decode('utf-8'))['items']
        for row in data:
            if('blog.naver' in row['link']):
                naver_urls.append(row['link'])
                postdate.append(row['postdate'])
                title = row['title']
                # html태그제거
                pattern1 = '<[^>]*>'
                title = re.sub(pattern=pattern1, repl='', string=title)
                titles.append(title)
        time.sleep(2)
    else:
        print("Error Code:" + rescode)
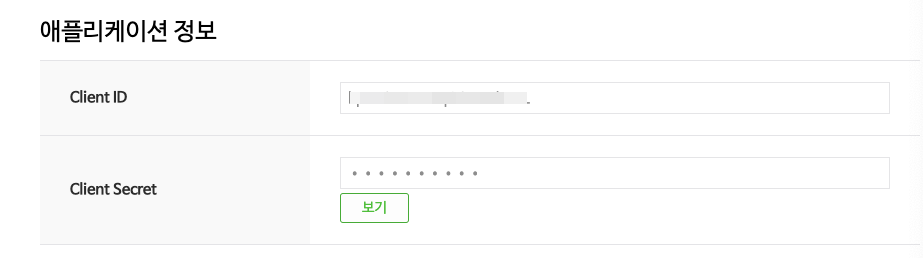
clinet_id와 client_secret 넣는 곳에 발급받으신 key를 넣습니다.
그리고 소스를 보시면 keyword를 input으로 입력받고 있는데 python으로 해당 코드를 실행하고 나서
원하는 블로그 검색 keyword를 입력받아 해당 주제를 크롤링할 수 있습니다
크롤링 끝낼 위치인 end 값은 반복문을 종료시킬 값이고 가져올 페이지 개수인 display은 한 번에 가져올 데이터 개수입니다.
즉 만약 end가 2이고 display가 5이라면 2* 5 = 10 즉 총 10개의 블로그를 크롤링합니다
그리고 이 단계에서 title과 postdata(발행일)을 파싱 해서 넣어줍니다.
url을 selenium을 통해 open 하고 html문을 가져온다
###naver 기사 본문 및 제목 가져오기###

# ConnectionError방지
headers = {"User-Agent": "Mozilla/5.0 (Windows NT 10.0; Win64; x64) Chrome/98.0.4758.102"}


contents = []
comments_texts = []
try:
    for i in naver_urls:
        print(i)
        driver.get(i)
        time.sleep(5)  # 대기시간 변경 가능

        iframe = driver.find_element(By.ID , "mainFrame") # id가 mainFrame이라는 요소를 찾아내고 -> iframe임
        driver.switch_to.frame(iframe) # 이 iframe이 내가 찾고자하는 html을 포함하고 있는 내용

        source = driver.page_source
        html = BeautifulSoup(source, "html.parser")
가져온 naver_url들을 가지고 다시 반복문을 돌려 해당 페이지를 새창으로 open 합니다
그리고 html을 가져와 내용을 파싱 하는 단계입니다.
페이지 오픈 시 sleep시간은 저는 5초로 주었는데 본인의 인터넷 속도에 맞게 적당한 시간을 주어야 블로그가 다 오픈된 이후에 제대로 파싱이 가능합니다. 그리고 가져온 내용은 beautifulSoup을 통해 html문을 가져옵니다.
가져온 html문에서 title, contents, postdate을 추출한다.
        # 검색결과 확인용
        # with open("Output.txt", "w") as text_file:
        #     text_file.write(str(html))

        # 기사 텍스트만 가져오기
        content = html.select("div.se-main-container")
        #  list합치기
        content = ''.join(str(content))

        # html태그제거 및 텍스트 다듬기
        content = re.sub(pattern=pattern1, repl='', string=content)
        pattern2 = """[\n\n\n\n\n// flash 오류를 우회하기 위한 함수 추가\nfunction _flash_removeCallback() {}"""
        content = content.replace(pattern2, '')
        content = content.replace('\n', '')
        content = content.replace('\u200b', '')
        contents.append(content)
title과 postdate의 경우는 앞서 naver url들을 가져오는 단계에서 이미 추출 후 배열에 별도 저장해 두었습니다
따라서 이 단계에서는 content 정보만 파싱 해서 저장합니다
전처리 단계에서 쓸데없는 Html 코드나 \n 같은 문자들은 제거해 깔끔하게 내용만 추출하도록 합니다
csv파일로 저장한다.
    news_df = pd.DataFrame({'title': titles, 'content': contents, 'date': postdate})
    news_df.to_csv('blog.csv', index=False, encoding='utf-8-sig')
except:
    contents.append('error')
    news_df = pd.DataFrame({'title': titles, 'content': contents, 'date': postdate})
    news_df.to_csv('blog.csv', index=False, encoding='utf-8-sig')
DataFrame으로 만들어서 csv 파일로 저장합니다
. to_csv()의 첫 번째 파라미터에 저는 "blog.csv"로 파일명을 저장하라고 하였습니다
잘 동작하지요? 최종적인 코드도 편의상 올려드리겠습니다
from bs4 import BeautifulSoup
import requests
import re
import time
import os
import sys
import urllib.request
import json
from selenium import webdriver
from selenium.webdriver.common.by import By
from webdriver_manager.chrome import ChromeDriverManager
from selenium.webdriver.common.keys import Keys
import pandas as pd

# 웹드라이버 설정
options = webdriver.ChromeOptions()
options.add_experimental_option("excludeSwitches", ["enable-automation"])
options.add_experimental_option("useAutomationExtension", False)

# 버전에 상관 없이 os에 설치된 크롬 브라우저 사용
driver = webdriver.Chrome(ChromeDriverManager().install())
driver.implicitly_wait(3)
# 버전에 상관 없이 os에 설치된 크롬 브라우저 사용


# Naver API key 입력
client_id = ''
client_secret = ''


# selenium으로 검색 페이지 불러오기 #
naver_urls = []
postdate = []
titles = []

# 검색어 입력
keword = input("검색할 키워드를 입력해주세요:")
encText = urllib.parse.quote(keword)

# 검색을 끝낼 페이지 입력
end = input("\n크롤링을 끝낼 위치를 입력해주세요. (기본값:1, 최대값:100):")
if end == "":
    end = 1
else:
    end = int(end)
print("\n 1 ~ ", end, "페이지 까지 크롤링을 진행 합니다")

# 한번에 가져올 페이지 입력
display = input("\n한번에 가져올 페이지 개수를 입력해주세요.(기본값:10, 최대값: 100):")
if display == "":
    display = 10
else:
    display = int(display)
print("\n한번에 가져올 페이지 : ", display, "페이지")


for start in range(end):
    url = "https://openapi.naver.com/v1/search/blog?query=" + encText + "&start=" + str(start+1) + "&display=" + str(display+1) # JSON 결과
    request = urllib.request.Request(url)
    request.add_header("X-Naver-Client-Id",client_id)
    request.add_header("X-Naver-Client-Secret",client_secret)
    response = urllib.request.urlopen(request)
    rescode = response.getcode()
    if(rescode==200):
        response_body = response.read()

        data = json.loads(response_body.decode('utf-8'))['items']
        for row in data:
            if('blog.naver' in row['link']):
                naver_urls.append(row['link'])
                postdate.append(row['postdate'])
                title = row['title']
                # html태그제거
                pattern1 = '<[^>]*>'
                title = re.sub(pattern=pattern1, repl='', string=title)
                titles.append(title)
        time.sleep(2)
    else:
        print("Error Code:" + rescode)


###naver 기사 본문 및 제목 가져오기###

# ConnectionError방지
headers = {"User-Agent": "Mozilla/5.0 (Windows NT 10.0; Win64; x64) Chrome/98.0.4758.102"}


contents = []
comments_texts = []
try:
    for i in naver_urls:
        print(i)
        driver.get(i)
        time.sleep(5)  # 대기시간 변경 가능

        iframe = driver.find_element(By.ID , "mainFrame") # id가 mainFrame이라는 요소를 찾아내고 -> iframe임
        driver.switch_to.frame(iframe) # 이 iframe이 내가 찾고자하는 html을 포함하고 있는 내용

        source = driver.page_source
        html = BeautifulSoup(source, "html.parser")
        # 검색결과 확인용
        # with open("Output.txt", "w") as text_file:
        #     text_file.write(str(html))

        # 기사 텍스트만 가져오기
        content = html.select("div.se-main-container")
        #  list합치기
        content = ''.join(str(content))

        # html태그제거 및 텍스트 다듬기
        content = re.sub(pattern=pattern1, repl='', string=content)
        pattern2 = """[\n\n\n\n\n// flash 오류를 우회하기 위한 함수 추가\nfunction _flash_removeCallback() {}"""
        content = content.replace(pattern2, '')
        content = content.replace('\n', '')
        content = content.replace('\u200b', '')
        contents.append(content)


    news_df = pd.DataFrame({'title': titles, 'content': contents, 'date': postdate})
    news_df.to_csv('blog.csv', index=False, encoding='utf-8-sig')
except:
    contents.append('error')
    news_df = pd.DataFrame({'title': titles, 'content': contents, 'date': postdate})
    news_df.to_csv('blog.csv', index=False, encoding='utf-8-sig')
이상입니다.
실행은 당연히 아시겠지만
python "파일명"으로 하시면 됩니다 :)
ex:) python blog.py
혹시나 안 되는 부분이 있으면 댓글 달아주시면 도와드리겠습니다
즐거운 하루 보내세요~
30살 연봉 1억 3천 5백 - 왜 내가 회사를 그만 두고 싶어하는지?
가난에서 중산층으로 한국에서 연봉 1억을 받고 있는 부자들에 관한 뉴스를 들어본 적이 있다. 대학교를 자퇴하고 중소기업에서 연봉 2천만원을 받고 있던 23살의 나에게는 꿈 같은 연봉이었고
developer-woo.tistory.com
'WebDev' 카테고리의 다른 글
| 코틀린에서의 인터페이스와 추상 클래스 (0) | 2023.03.26 |
|---|---|
| 코틀린에서의 상속 및 다형성 (0) | 2023.03.26 |
| Kotlin에서 함수 및 람다 (0) | 2023.03.26 |
| 코틀린에서의 제어 흐름과 반복문 (0) | 2023.03.26 |
| 코틀린(Kotlin) 기초 구문 (0) | 2023.03.26 |
댓글